Introduction to Reactive Cocoa 4 (pt 1)
23 Apr 2016Note: This is really outdated. Please see my newer posts on the topic!
Reactive Cocoa 4 is pretty new and there are some big syntax changes since previous versions. Unfortunately this means all the information online at the moment is more concerned with those changes rather than showing you how to use it from scratch. If you’re new to the whole thing, that steep FRP learning curve is even more steep than normal. Until now. Hold on to your flatMaps, I give you:
The ELI5 idiots guide to Reactive Cocoa 4 for dummies who are fluent in Swift 2 but know nothing about any version of Reactive Cocoa (though maybe know a little bit of what FRP is all about)
Before you start, get a clone of the Reactive Cocoa Github repo up and running in Xcode, set up a playground that imports the ReactiveCocoa and Result frameworks (checkout that PR if you’re lazy like me) and grab a fresh cup of ☕️
Right, you good? Ok let’s go.
Signals, Events, Values, say what?
Say you want to send an Int somewhere. In ReactiveCocoa 4 speak, that Int is a value, that is sent on a Signal. A Signal can be used to send any number of values over time, so it’s best to think about it as a continuous stream that values flow down. For an object to receive these values, it needs to observe the Signal.
Makes sense. So let’s send our Int. To do this, we create a Signal and it’s corresponding Observer, and we send the Int using the Observer object. This can be slightly confusing at first, but it’s very simple: the Observer object isn’t the object observing the Signal - it represents objects that are observing the Signal. So when we send a value using our Observer object, we’re really sending a value down the Signal to everything observing the Signal.
That’s a bit to take in, let’s demonstrate. We’re going to set up a Signal + Observer pair using the pipe constructor and send some values:
Yep, no code to copy paste. Suck it up, type it out, mess with the values, play with the graphs, it’s better this way
So what’s going on here? First, we use pipe to get our Signal Observer pair. Our Signal has been set up to have Ints flow along it. We then set up a closure on the Signal to fire every time a value is sent (effectively decoupling the Signal from anything observing it - nice). Finally, we send some Ints down the Signal using it’s Observer object.
As you can see from the pretty Xcode Playground graph, the observeNext closure has fired once for each Int sent, in the order that we sent them 🎉
But what’s with the Next stuff? Well, values are actually sent down a Signal wrapped in Next Events. There are a few different types of Events that can be sent down a Signal - more on this shortly.
So the cool thing about Signals is that they can be observed by any number of closures (and in turn, any number of objects). So the value of one sendNext can be received and used in many different ways and contexts.

Event Types
As mentioned before, values sent down a Signal are actually wrapped in a Next Event. There are other Event types too.
First, there’s the Failed Event. The Failed Event carries an ErrorType and when sent causes the Signal to stop. So if we encounter a situation where we want the Signal to stop, and to inform anything observing the Signal what went wrong, we can simply sendFailed with an ErrorType:
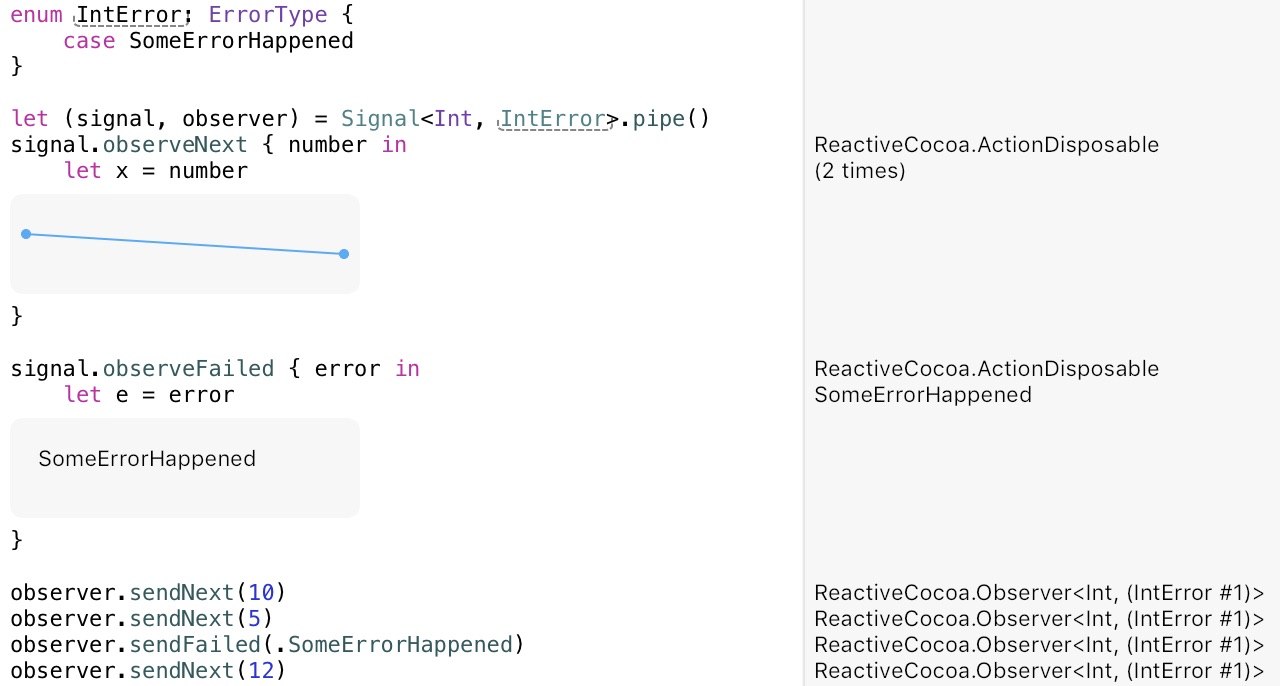
The last value (12) didn’t send, because the Signal had already failed with the Failed Event carrying the SomeErrorHappened Error. Perfect.
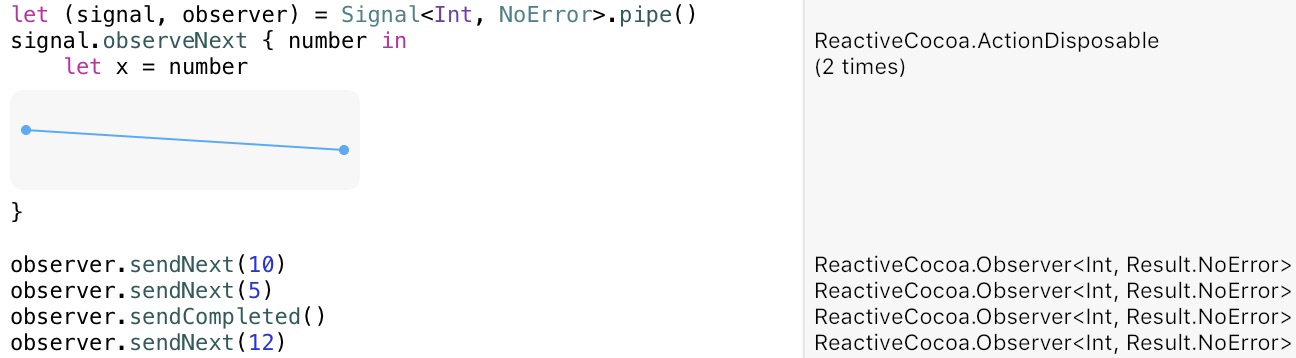
We also have a Completed Event. This also causes the Signal to stop, but without sending an Error Event. We use this to indicate the Signal is finished and we don’t need it anymore. Even if we’re clumsy with our code and try to send a Next Event after a Signal has Completed, it won’t send - the Signal is already stopped.
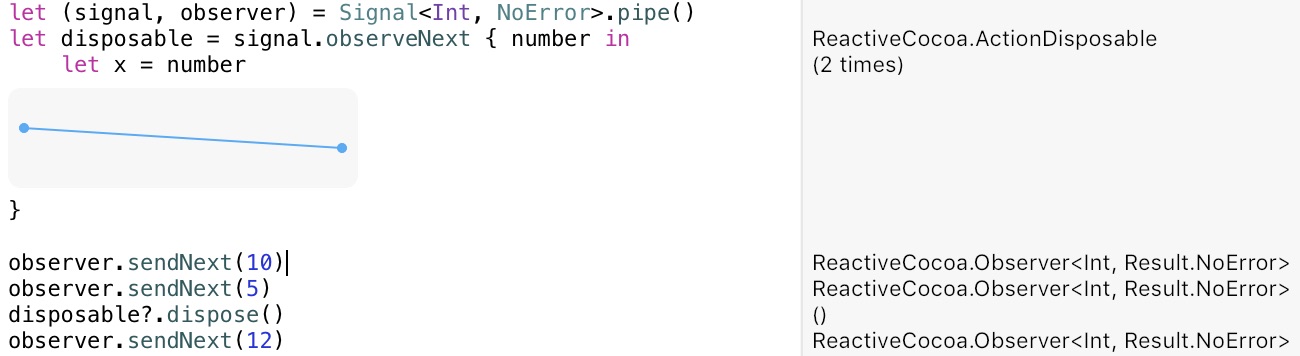
And finally there is the Interrupted Event, which is very similar to the Completed Event, but happens automatically. So you know how you call the observe methods on the Signal to add closures that fire when different Events flow down the Signal? Each time we set up one of these observations, we get a Disposable object. Using the dispose method on this object, we can remove or dispose of that particular observation. And when there is nothing left observing the Signal, it stops with the Interrupted Event. If a tree falls in the forest and no one is around, does it make a sound? We’ll never know, that Signal was Interrupted when everyone left the forest 🌝
So this is all kinda interesting and cool, but can we use any of this in real world code yet? Let’s see what we’ve got so far:
- An object other things can observe to receive values (
Signal) - An object to send these values (
Observer) - Error handling
How many times have you updated a value in a model object, and then needed to refresh anything that uses this model object for display? Was it annoying and a little more complicated than it needed to be? Was your view suddenly coupled to your model? Wouldn’t it be great if there was a decoupled way of notifying all objects interested in this value change? Without the hassle of KVO?
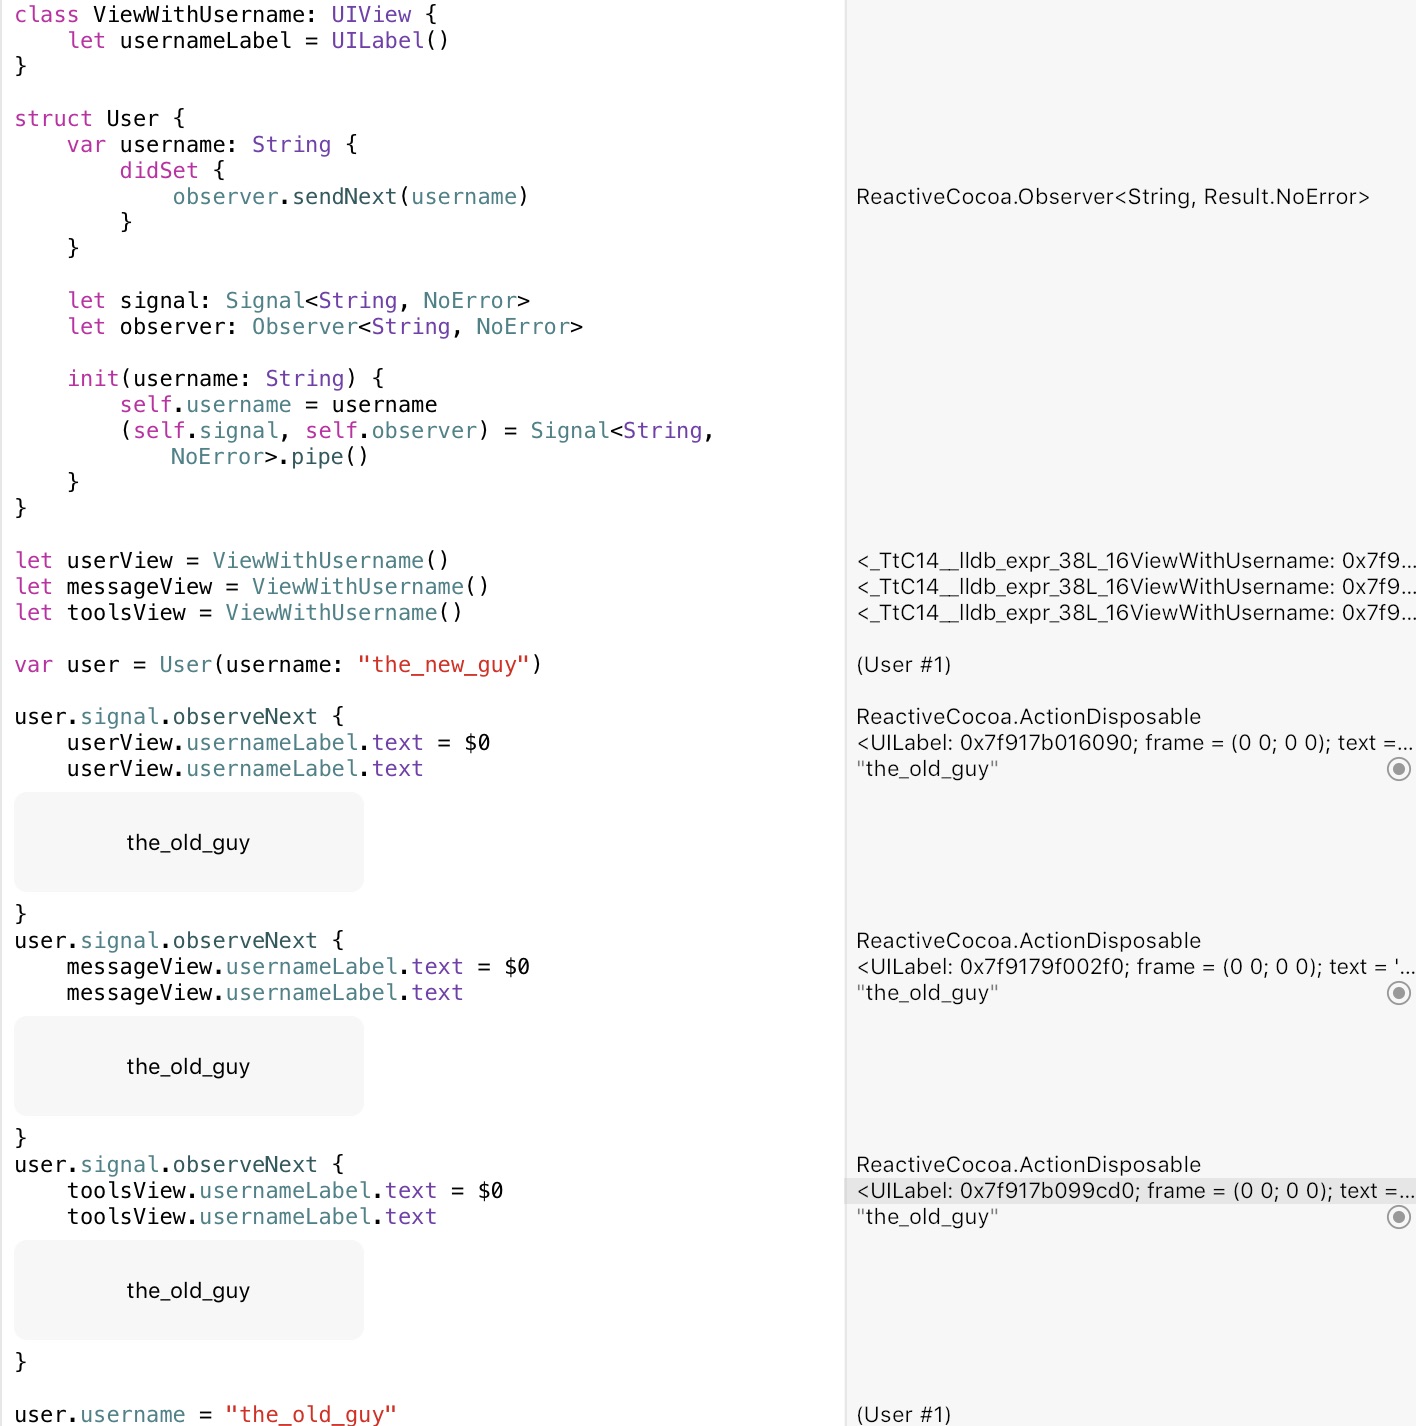
That’s pretty neat. Really neat. We have all the logic in one place (observation setup, and what happens when values change), simply by providing a Signal that the UILabels can observe for changes. No coupling, endless observations, everything in sync. But it requires a bit of boilerplate (an Observer and Signal for each of my model’s var’s). Imagine what happens when we have a bunch of models all with different vars. Well, guess what? This is such a common usage of Reactive Cocoa that they’ve thought of this too. Welcome to
Mutable Properties
These take the pattern above and wrap it up into a neat little package. No more boilerplate. Let’s see the same thing, but using a MutableProperty var:

Well that’s super neat. Really super neat. By wrapping our vars as MutablePropertys, each of them have their own little Signals that fire whenever the value changes. But we’re not done yet - our observeNext’s all follow the same pattern: update a var when new values arrive. Guess who thought of this common scenario again? Welcome to
Bindings
A Binding allows you to say, in one fell swoop of the <~ operator, “whenever this var updates, make sure this one updates to it’s value”. Check it out:

Here we set up a UILabel subclass1 to provide the MutableProperty already set up to bind to. Then we just connect stuff up using <~ and that’s that.2
Once we have the BindableLabel, look how simple and easy our code becomes. Everything needed to understand the “make our label text always equal whatever value the username var is” is literally on 1 line. Much declarative, so simple. In fact, if we focus in on the code that creates our model, views and joins them together, it looks like this:

Take that KVO! 🙌
You can wrap anything with a Signal Observer pair and expose it for other objects to observe, or even bind to MutablePropertys, moving all the logic to do with an action into one easy to read place. How powerful is that. But unfortunately it’s not always as simple as our String <~ String binding here though. We sometimes need to massage our values, wait for values from other Signals, ignore certain values, or change types entirely before they can be used by different objects….
And that’s exactly what the next installment is about (and more). See you in pt 2! 👋
-
Some people use associated properties to allow binding directly to Objective-C UIKit vars, but I think it’s clearer if you do it with dedicated subclasses. If you see a
BindableLabel / ProgressView / Slider / Whatever, then you know that it’s vars are changed by <~ bindings and not directly elsewhere. If you see vanilla UIKit objects, then you know their vars are updated directly, literally anywhere in your code. When this behaviour is desired, I think it’s clearer to make this distinction. ↩ -
I’m not usually one for infix’s, but in this case it really shows what’s going on. In Reactive Cocoa 3 they used to have more, but thankfully decided to keep it Swifty and use
.’s instead of|>↩